Toilet seat hinges are the parts that connect the seat and lid to the toilet bowl. They allow you to raise and lower the seat and lid easily and quietly. However, they can wear out, break, or become loose over time, making your toilet seat uncomfortable or unsafe to use. Fortunately, you don’t have to replace the whole toilet seat if the hinges are faulty.
You can replace them with new ones that match your toilet seat model and style. Here is a step-by-step guide on how to replace toilet seat hinges.
What You’ll Need
To replace your toilet seat hinges, you’ll need the following tools and materials:
- A new set of toilet seat hinges that are compatible with your toilet seat
- A screwdriver (flathead or Phillips, depending on your hinge type)
- A wrench or pliers
- A small hacksaw or a drill (optional, in case of stubborn bolts)
- Penetrating oil (optional to loosen rusty bolts)
- A rag or paper towel
- A pair of gloves
Step 1: Remove the Old Toilet Seat
The first step is to remove your old toilet seat from the toilet bowl. To do this, lift the toilet seat lid and locate the hinges at the back.
Depending on your hinge type, you may need to open some protective caps or covers to access the screws that hold the hinges to the lid.
Use a screwdriver to unscrew these screws and remove the lid from the hinges.
Step 2: Remove the Old Hinges
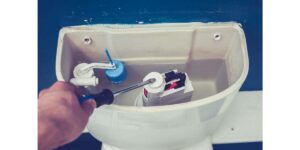
Next, you need to remove the old hinges from the toilet bowl. To do this, look under the rim of the bowl and find the bolts that attach the hinges to the bowl.
These bolts may have nuts or wing nuts that secure them in place. Use a wrench or pliers to loosen and remove these nuts. If the bolts are rusty or stuck, you may need to spray some penetrating oil on them and wait for a few minutes before trying again.
If that doesn’t work, you may need to cut them off with a hacksaw or drill them out.
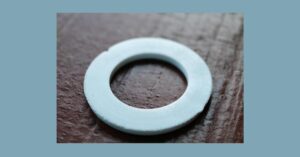
Once you have removed the nuts, pull out the bolts and washers from the holes in the bowl. Then, lift the old hinges from the bowl and discard them.
Step 3: Clean the Toilet Bowl
Before installing the new hinges, it’s a good idea to clean the toilet bowl where the old hinges are attached.
This will remove any dirt, rust, or residue that may interfere with the installation of the new hinges.
Use a rag or paper towel to wipe down the area around the holes in the bowl. You may also use some mild soap and water if needed.
Step 4: Install the New Hinges
Now that you have prepared your toilet bowl rim, you can install your new hinges. Follow these steps:
- Take your new hinges from their packaging and check if they come with screws, bolts, nuts, washers, and caps. If not, you may need to use some old ones or buy new ones that fit your hinges.
- Attach each hinge to your toilet seat lid by inserting a screw through the hole on the hinge and into the hole on the lid. Use a screwdriver to tighten it securely. Ensure that both hinges are aligned with each other and your seat.
- Next, place your seat and lid on top of your toilet bowl rim and align each hinge with a hole on the rim. Insert a bolt with a washer through each hole on the rim and into each hinge.
- Go under the bowl rim and screw a nut onto each bolt with your fingers. Then use a wrench or pliers to tighten them firmly but not too much. You want your seat and lid to be stable but still able to move smoothly.
- Finally, snap or slide on each cap over each bolt head and nut.
Step 5: Attach the New Lid
The next step is to attach your new lid to your new hinges. To do this, follow these steps:
- Take your new lid and align its holes with the screws on your new hinges.
- Use a screwdriver to screw in these screws and secure your lid to your hinges.
- Make sure your lid is aligned and level with your seat.
- Close any protective caps or covers on your hinges if applicable.
Step 6: Test Your New Toilet Seat Hinges
The final step is to test your new toilet seat hinges for functionality and comfort. To do this, follow these steps:
- Lift and lower your lid several times and check if it opens and closes smoothly and quietly.
- Sit on your seat and check if it feels stable and comfortable.
- Adjust any screws or nuts to improve your lid or seat alignment or tightness.
Tips for Replacing Toilet Seat Hinges
Here are some tips that can help you replace your toilet seat hinges more easily and safely:
- Wear gloves when handling old or rusty bolts or hinges to avoid cuts or infections.
- Check your toilet seat model and style before buying new hinges to ensure compatibility and fit.
- Keep all your tools and materials handy and organized before starting your project.
- Dispose of your old hinges properly according to local regulations.
How to Prevent Toilet Seat Hinge Problems
To prevent these problems from happening in the future, you can follow these simple tips:
- Clean your toilet seat regularly with mild soap and water to prevent dirt buildup or rust formation on your hinges.
- Check your toilet seat periodically for any signs of damage or wear on your hinges.
- Tighten any loose screws or nuts on your hinges as soon as possible.
- Replace any faulty or broken hinges as soon as possible.
Key Takeaway Table
| Topic | Key Points |
|---|---|
| What You’ll Need | A new set of compatible toilet seat hinges A screwdriver A wrench or pliers A hacksaw or drill (optional) Penetrating oil (optional) A rag or paper towel Gloves |
| How to Replace Toilet Seat Hinges | Remove old lid Remove old hinges Clean bowl Install new hinges Attach new lid Test new hinges |
| Tips for Replacing Toilet Seat Hinges | Wear glove Check compatibility Keep tools handy Dispose of properly |
| Benefits of Replacing Toilet Seat Hinges | Improve comfort Enhance appearance Save money Prevent accidents |
| Common Problems with Toilet Seat Hinges | Loose Broken Rusty Mismatched |
| How to Prevent Toilet Seat Hinge Problems | Clean regularly Check periodically Tighten promptly Replace timely |
Related pages
- How to Remove Plastic Nut from Toilet Tank
- How to Repair a Noisy Toilet
- How to Replace a Toilet Flush Valve
- How to Remove a Stuck Shower Head without Tools
- How to Tighten Toilet Seat with No Access Underside