Tiling a bathroom wall can be a great way to update the look and feel of your space. There is a tile option whether you want to create a sleek and modern vibe, a cozy and rustic atmosphere, or a colorful and eclectic style. But how hard is it to tile a bathroom wall? Is it a DIY project you can tackle alone, or do you need to hire a professional? In this article, we will answer these questions and give you some tips and tricks on tiling a bathroom wall successfully.
The Benefits of Tiling a Bathroom Wall
Before we get into the nitty-gritty of how to tile a bathroom wall, let’s talk about why you might want to do it in the first place. Here are some of the benefits of tiling a bathroom wall:
- Tiles are durable and easy to clean. They can withstand moisture, humidity, stains, and scratches better than most other wall materials. They are also easy to wipe down with a damp cloth or sponge.
- Tiles are versatile and customizable. You can choose various colors, shapes, sizes, patterns, and textures to suit your taste and design vision. You can also mix and match different tiles to create unique effects and contrasts.
- Tiles are stylish and attractive. They can add visual interest and character to your bathroom wall, making it more appealing and inviting. They can also reflect light and make your bathroom look brighter and bigger.
The Challenges of Tiling a Bathroom Wall
Tiling a bathroom wall is not as hard as it may seem, but it does require some preparation, patience, and skill. Here are some of the challenges that you may face when tiling a bathroom wall:
- Choosing the right tiles. With so many options available, deciding which tiles are best for your bathroom wall can be hard. It would be best to consider the tiles’ size, shape, color, pattern, texture, material, and cost. You must also ensure the tiles are suitable for wet areas and have a high slip resistance rating.
- Preparing the wall surface. Before tiling, ensure the wall surface is smooth, level, clean, and dry. You may need to remove any existing tiles, paint, wallpaper, or wall coverings. You may also need to repair any cracks, holes, or damages on the wall. You may need to install a backer board or a waterproof membrane on the wall to provide a sturdy and moisture-resistant base for the tiles.
- Cutting and laying the tiles. Cutting and laying the tiles can be tricky, especially if you have curved or angled walls or corners. You must measure and mark the wall carefully to ensure the tiles are aligned and spaced evenly. Using the right tools and techniques to cut the tiles accurately and safely would be best. You need to apply the right amount of adhesive and grout on the wall and press the tiles firmly into place.
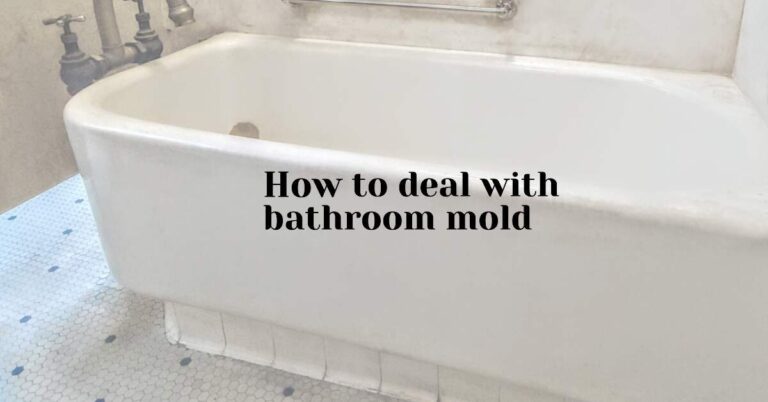
- Finishing and sealing the tiles. After you have laid all the tiles on the wall, you need to wait for the adhesive and grout to dry completely before you can finish and seal them. You must remove any excess adhesive or grout from the tile surface with a sponge or cloth. You must also apply a sealant on the tiles and grout lines to protect them from water damage and mold growth.
How to Tile a Bathroom Wall: A Step-by-Step Guide
Now that you know the benefits and challenges of tiling a bathroom wall, let’s get into the step-by-step guide on how to do it yourself. Here are the basic steps that you need to follow:
Step 1: Choose your tiles
The first step is to choose the tiles for your bathroom wall. As we mentioned earlier, there are many factors that you need to consider when choosing your tiles, such as:
- The size of your bathroom wall. The size of your bathroom wall will determine how many tiles you need and how big or small they should be. Generally, larger tiles are easier to install than smaller ones but may not fit well in tight spaces or around fixtures. Smaller tiles are more flexible and versatile but may require more cutting and grouting.
- The style of your bathroom. Your bathroom style will influence what kind of tiles you want for your bathroom wall. For example, if you have a modern bathroom, you may want to use sleek and glossy tiles in neutral or monochrome colors. If you have a rustic bathroom, you may want matte or textured tiles in warm or earthy tones.
- The budget of your project. Your project’s budget will affect how much you can spend on your tiles. Tiles vary widely in price depending on their material, quality, design, and brand. Ceramic or porcelain tiles are usually cheaper than stone or glass tiles. Plain or solid-colored tiles are usually cheaper than patterned or mosaic tiles.
Step 2: Prepare your wall surface
The next step is to prepare your wall surface for tiling. As mentioned, you must ensure the wall surface is smooth, level, clean, and dry. Here are some tips on how to prepare your wall surface:
- Remove any existing tiles, paint, wallpaper, or other wall coverings. You can use a scraper, a chisel, a hammer, or a heat gun to remove them. Be careful not to damage the wall underneath.
- Repair any cracks, holes, or damages on the wall. You can use a filler, a putty knife, or sandpaper to repair them. Make sure to smooth out any bumps or rough edges.
- Install a backer board or a waterproof membrane on the wall. You can use a cement board, a fiber cement board, or a gypsum board as a backer board. You can use a plastic sheet, a rubber sheet, or a liquid membrane as a waterproof membrane. You need to cut the backer board or the membrane to fit the wall and attach it with screws, nails, or adhesive. Make sure to cover any gaps or seams with tape or caulk.
Step 3: Cut and lay the tiles
The third step is to cut and lay the tiles on the wall. This is the project’s most challenging and time-consuming part, so you must be patient and careful. Here are some tips on how to cut and lay the tiles:
- Measure and mark the wall. You must measure and mark the wall to determine where to start and end your tile layout. You can use a tape measure, a pencil, and a level to do this. You can also use a timber batten to keep your tiles straight and level.
- Cut the tiles. You must cut the tiles to fit around corners, edges, fixtures, or outlets. You can use a tile cutter, a wet saw, a tile nipper, or a tile scorer. Wear gloves, goggles, and a mask when cutting the tiles.
- Lay the tiles. You must lay the tiles on the wall in your desired pattern and direction. You can use tile adhesive, tile spacers, tile trowels, and tile sponges. Apply enough adhesive on the wall and press the tiles firmly into place. Make sure to leave enough space between the tiles for grout.
Step 4: Finish and seal the tiles
The final step is to finish and seal the tiles on the wall. This is the project’s easiest and most satisfying part as you see your work come together. Here are some tips on how to finish and seal the tiles:
- Remove any excess adhesive or grout from the tile surface. Before it dries, remove any excess adhesive or grout from the tile surface with a sponge or cloth. Make sure not to disturb the tiles or grout lines.
- Apply grout on the tile joints. You must apply grout on the tile joints with a grout float or bag. Fill all the gaps and wipe off excess grout with a damp sponge.
- Apply sealant on the tiles and grout lines. You must apply sealant on the tiles and grout lines with a brush or a spray bottle. Make sure to follow the manufacturer’s instructions and let it dry completely.
Conclusion
Tiling a bathroom wall can be a rewarding DIY project to transform your bathroom into your dream space. It can also be fun and creative, as you can choose from various tile options and designs. However, it can also be challenging and tedious, as you must properly prepare, cut, lay, finish, and seal the tiles.
To make your tiling project easier and more successful, you need to follow these steps:
- Choose your tiles based on your bathroom size, style, and budget.
- Prepare your wall surface by removing existing coverings, repairing any damages, and installing any backer board or waterproof membrane.
- Cut and lay your tiles by measuring and marking your wall accurately and safely and laying your tiles evenly and firmly.
- Finish and seal your tiles by removing any excess adhesive or grout from your tile surface, applying grout on your tile joints, and applying sealant on your tiles and grout lines.
Following these steps, you can tile your bathroom wall like a pro and enjoy your new bathroom for years.
