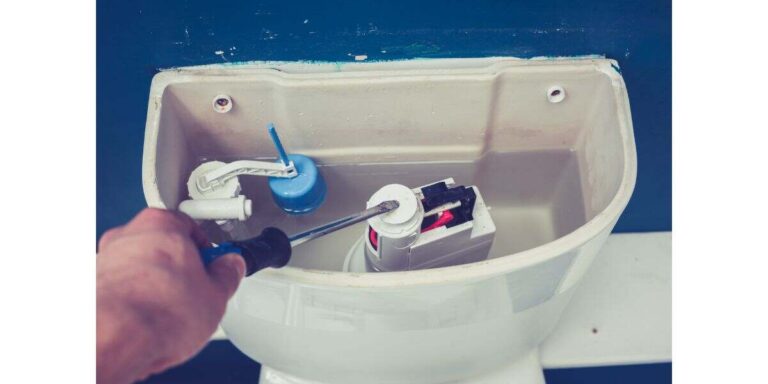
Many people wonder if they should caulk around the toilet flange when installing a toilet.
The toilet flange is a fitting that connects the toilet to the drainpipe on the floor.
Some people argue that caulking around the flange can prevent water from seeping under the toilet and causing damage, while others believe caulking can trap moisture and lead to more problems.
This article will explore the pros and cons of caulking around the toilet flange and guide whether or not you should caulk around your toilet.
- Should I Caulk Around the Toilet Flange?
- Determining Whether or Not to Caulk Around the Toilet Flange
- Consider When Deciding on Caulking
- Type of Toilet Flange
- PVC or ABS Plastic Flange
- Metal Flange
- If your Flange is in Good Condition
- If your Flange is in Poor Condition
- What are the Benefits of Caulking Around the Toilet Flange?
- What are the Risks of Caulking Around the Toilet Flange?
- Caulking Around the Toilet Flange
- Use Silicone to Caulk Around a Toilet
- How to Properly Remove Old Caulking Before Applying a New One
- Conclusion
Should I Caulk Around the Toilet Flange?
Yes, you should. Caulking around the toilet flange is a good idea for several reasons:
- It will help prevent water from leaking from under the flange and onto the floor.
- It will help to keep sewer gases from coming up through the drain and into the bathroom.
- It will help keep the flange from becoming loose and coming up from the floor.
Determining Whether or Not to Caulk Around the Toilet Flange
First, is a good seal between the flange and the floor already? If so, caulking may not be necessary.
If there is no good seal, caulking can help prevent water from seeping through and causing damage.
Another consideration is how often the toilet is used. If used frequently, caulking may need to be replaced more often.
Consider When Deciding on Caulking
When deciding on caulking, there are a few things to consider to make the best decision.
The first is the type of caulk you will need. There are many different types of caulk, so be sure to choose the one that is best for your job.
The second thing to consider is the area you are caulking. Make sure the area is clean and dry before you begin.
The third thing to consider is the weather. The caulk will not adhere properly if it is too hot or too cold weather.
Be sure to read the instructions on the caulk before beginning.
Type of Toilet Flange
There are three main types of toilet flanges–
- metal,
- plastic and
- rubber
Each type has pros and cons, so choosing the right one for your needs is important.
- Metal flanges are the most durable but also the most expensive.
- Plastic flanges are less expensive and still quite durable but not as strong as metal flanges.
- Rubber flanges are the least expensive and least durable option, but they’re the easiest to install.
Flanges come in different sizes. The most common are 3″, 4″ and 5″.
PVC or ABS Plastic Flange
If you have a PVC or ABS plastic flange, caulking is unnecessary. The flange will provide a water-tight seal without the need for caulking.
If you are installing a new flange, you will need to use caulking.
If you are replacing an old flange, you may not need to use caulking, depending on the condition of the old flange.
Metal Flange
If your flange is metal, caulking may be necessary to prevent leaks.
Use a putty knife to apply a bead of silicone-based caulk around the perimeter of the flange. Use a caulk gun for larger jobs.
Smooth the bead of caulk with your finger. Wipe away any excess caulk with a damp cloth.
If your Flange is in Good Condition
If your flange is in good condition, caulking is not necessary, but if your flange is not in good condition and there is any leakage, then caulking may be necessary.
Caulking should only be used if there is an immediate threat of water leaking into the system.
Caulking is applied to the outside of the flange to seal the opening where water will enter.
If your Flange is in Poor Condition
If your flange is in poor condition, caulking may be your only option.
Caulking can seal small cracks and gaps in the metal flange and fill small holes.
If the flange is cracked, it may be necessary to replace it.
What are the Benefits of Caulking Around the Toilet Flange?
There are several benefits to caulking around the toileting area.
Caulking around the toilet flange is important to prevent water damage.
A properly sealed toilet flange will keep water from seeping through and causing damage to the surrounding area.
In addition, caulking will help to keep your toilet clean and free from bacteria.
What are the Risks of Caulking Around the Toilet Flange?
- Caulk may not adhere properly, which could allow water to seep behind the toilet and cause damage.
- The caulk can become brittle and crack over time, allowing water to seep through and cause damage.
- Caulking around the toilet flange can create a seal that is difficult to break if the flange needs to be repaired or replaced. This can lead to costly repairs.
- If the caulking around the toilet flange is not done properly, it can lead to water leaks, which can cause extensive damage to the surrounding area.
Caulking Around the Toilet Flange
It is best to use silicone caulk when caulking around a toilet flange. This type of caulk has excellent adhesion properties and will create a watertight seal.
Follow the below steps to apply the caulk around the perimeter of the flange:
- Clean the area around the toilet flange.
- Verify that the toilet is installed properly and leveled.
- Inspect the toilet flange and caulk any areas that are cracked or missing.
- Apply a single coat of caulk to the toilet flange and tighten the bolts securely.
- Use a caulking tool to apply a second coat of caulk to the tightened areas.
- Apply a layer of caulking around the drainpipe.
- Apply a layer of caulking around the toilet.
- Allow the caulk to cure for 24 hours.
Use Silicone to Caulk Around a Toilet
Silicone is a good option for sealing around the toilet flange because it will not be affected by moisture or toiletry chemicals.
You should use a silicone-based caulk that is made for use in bathrooms so that it will not peel away or degrade over time.
If you use a solvent-based sealant and allow it to dry for 24 hours, caulking may not be necessary to prevent leaks.
How to Properly Remove Old Caulking Before Applying a New One
Caulking is a common home improvement task that helps to seal gaps and prevent water damage.
However, before applying new caulking, it is important to remove the old caulking properly.
Here are some steps to follow for proper removal:
- Gather your tools: You will need a caulk removal tool, a utility knife or a razor blade, a scraper, and rubbing alcohol.
- Soften the old caulking: Apply heat to the old caulking using a heat gun or hairdryer. This will soften the caulking, making it easier to remove.
- Use a caulk removal tool: The caulk removal tool is designed to remove old caulking. Use the tool to pry and scrape away the old caulking gently.
- Use a utility knife or razor blade: For stubborn caulking that the caulk removal tool cannot remove, use a utility knife or razor blade to cut away the remaining caulking carefully. Be careful not to damage the surface underneath.
- Scrape away the old caulking: Use a scraper to carefully scrape away any remaining caulking. Be gentle to avoid scratching the surface.
- Clean the area: Use rubbing alcohol and a clean cloth to clean the area where the old caulking was removed. This will help to remove any remaining residue and prepare the surface for the new caulking.
- Let the area dry: Allow the area to dry completely before applying the new caulking.
Following these steps, you can properly remove old caulking and prepare the surface for new caulking.
Proper removal ensures a tight seal and prevents future water damage.
Conclusion
There are a few things to consider when deciding whether or not to caulk around the toilet flange.
First, if you’re experiencing any leaks from your toilet, the caulk can help to prevent further leaks.
Second, if you’re concerned about potential leaks in the future, caulking may help to prevent them.
Finally, if you’re trying to improve the appearance of your bathroom, caulk can give the area a neater look.